반응형
조회나 작성기능은 누구나 접근해도 괜찮지만 작성한 게시글을 삭제하거나 수정할 때는 작성한 작성자만 접근할 수 있도록 변경했습니다 그래서 Post 엔티티에 password 필드를 넣어 비밀번호를 통해서 접근하도록 수정했습니다
Post
package com.domain.openboard.domain;

import jakarta.persistence.*;
import lombok.AccessLevel;
import lombok.Builder;
import lombok.Getter;
import lombok.NoArgsConstructor;
import org.springframework.data.annotation.CreatedDate;
import org.springframework.data.annotation.LastModifiedDate;
import org.springframework.data.jpa.domain.support.AuditingEntityListener;
import java.time.LocalDateTime;

@Entity // 엔티티로 지정
@Getter
@Table(name = "Post")
@NoArgsConstructor(access = AccessLevel.PROTECTED) // 기본 생성자 (protected 제한하여 무분별한 객체 생성을 방지)
@EntityListeners(AuditingEntityListener.class)// 엔티티 리스너를 적용 (Auditing 기능을 포함시킨다) @CreateDate 기능 사용시 필요
public class Post {
    @Id
    @GeneratedValue(strategy = GenerationType.IDENTITY) // 기본키를 자동으로 1씩 증가
    @Column(name = "post_id", updatable = false)
    private Long post_id;

    @Column(name = "title", nullable = false,length = 200)
    private String title;

    @Lob // Large Object 긴 문자열에 사용
    @Column(name = "content",nullable = false,columnDefinition = "MEDIUMTEXT")
    private String content;

    @Column(name = "name" ,nullable = false)
    private String name;

    @Column(name = "like_count",nullable = false)
    private int likeCount;

    @Column(name = "password",nullable = false)
    private String password;

    @CreatedDate // 엔티티가 처음 저장될 때의 시간 자동 기록
    @Column(name = "create_at",updatable = false)
    private LocalDateTime create_at;

    @LastModifiedDate // 엔티티가 수정될 때의 시간 자동 기록
    @Column(name = "updated_at")
    private LocalDateTime update_at;

    // 빌더 패턴 적용
    @Builder
    public Post(String title, String content, String name,String password) {
        this.title = title;
        this.content = content;
        this.name = name;
        this.likeCount = 0; // 기본 좋아요 개수는 0개
        this.password = password;
    }

    public void update(String title,String content){
        this.title = title;
        this.content = content;
    }
}
password 암호화를 위해서 security 의존성을 추가하고 설정 클래스를 만들어줬습니다
security
implementation("org.springframework.boot:spring-boot-starter-security")SecurityConfig
package com.domain.openboard.config;

import org.springframework.context.annotation.Bean;
import org.springframework.context.annotation.Configuration;
import org.springframework.security.config.annotation.web.builders.HttpSecurity;
import org.springframework.security.crypto.bcrypt.BCryptPasswordEncoder;
import org.springframework.security.crypto.password.PasswordEncoder;
import org.springframework.security.web.SecurityFilterChain;

@Configuration
public class SecurityConfig {

    @Bean
    public SecurityFilterChain securityFilterChain(HttpSecurity http) throws Exception {
        http
                .csrf(csrf -> csrf.disable()) // CSRF 보호 비활성화
                .authorizeHttpRequests(auth -> auth
                        .anyRequest().permitAll() // 모든 요청 허용
                );

        return http.build();
    }

    @Bean
    public PasswordEncoder passwordEncoder() {
        return new BCryptPasswordEncoder();
    }
}
현재 프로젝트에서는 password 암호화만 사용하기 때문에 security 기능은 사용하지 않습니다
CRUD 기능 구현
PostService
package com.domain.openboard.service;

import com.domain.openboard.domain.Post;
import com.domain.openboard.dto.PostRequestDto;
import com.domain.openboard.dto.PostUpdateRequestDto;
import com.domain.openboard.repository.PostRepository;
import jakarta.transaction.Transactional;
import lombok.RequiredArgsConstructor;
import org.springframework.security.crypto.password.PasswordEncoder;
import org.springframework.stereotype.Service;
import java.util.List;

@Service
@RequiredArgsConstructor // final이 붙거나 @NoNull이 붙은 필드의 생성자 추가
@Transactional // 클래스 전체 트랜잭션 적용
public class PostService {

    private final PostRepository postRepository;
    private final PasswordEncoder passwordEncoder;

    // 게시글 작성
    public Post save(PostRequestDto dto){
        String hashedPassword = passwordEncoder.encode(dto.getPassword());
        return postRepository.save(dto.toEntity(hashedPassword));
    }

    // 게시글 전체 조회
    public List<Post> findAll() {
        return postRepository.findAll();
    }

    // 게시글 단건 조회
    public Post findById(Long id) {
        return postRepository.findById(id)
                .orElseThrow(() -> new RuntimeException("Post not found" + id)); // 엔티티를 조회하고 없으면 예외 발생
    }

    // 게시글 삭제
    public void delete(Long id,String inputPassword){
        Post post = postRepository.findById(id)
                .orElseThrow(() -> new RuntimeException("Post not found" + id));

        // 입력 받은 password와 게시글에 저장된 password를 비교
        if(!passwordEncoder.matches(inputPassword,post.getPassword())){
            throw new RuntimeException("비밀번호가 일치하지 않습니다");
        }
        postRepository.delete(post);
    }

    // 게시글 수정
    public Post update(Long id, PostUpdateRequestDto dto){
        Post post = postRepository.findById(id)
                .orElseThrow(() -> new RuntimeException("Post not found" + id));

        if(!passwordEncoder.matches(dto.getPassword(),post.getPassword())){
            throw new RuntimeException("비밀번호가 일치하지 않습니다");
        }
        post.update(dto.getTitle(),dto.getContent());
        return post;
    }
}
게시글을 작성할때 password를 입력받고 입력받은 password는 PasswordEncoder를 통해 암호화되어 데이터베이스에 저장됩니다
또한 게시글을 수정하거나 삭제 작업을 할 때는 사용자에게 password를 입력받고 저장된 password를 복호화 작업 후 같은지 비교하여 다르면 "비밀번호가 일치하지 않습니다"라는 예외를 발생 맞다면 수정,삭제 작업을 진행하도록 구현했습니다
PostController
package com.domain.openboard.controller;

import com.domain.openboard.domain.Post;
import com.domain.openboard.dto.*;
import com.domain.openboard.service.PostService;
import lombok.RequiredArgsConstructor;
import org.springframework.http.HttpStatus;
import org.springframework.http.ResponseEntity;
import org.springframework.web.bind.annotation.*;
import java.util.List;

@RequiredArgsConstructor
@RequestMapping("/api") // 전체 기본 경로
@RestController // HTTP Response Body에 객체 데이터를 JSON 형식으로 변환
public class PostController {

    private final PostService postService;

    // 게시글 작성 API
    @PostMapping("/posts")
    public ResponseEntity<PostResponseDto> addPost(@RequestBody PostRequestDto dto){
        Post post = postService.save(dto);
        return ResponseEntity.status(HttpStatus.CREATED)
                .body(new PostResponseDto(post));
    }

    // 게시글 목록 조회 API
    @GetMapping("/posts")
    public ResponseEntity<List<PostListResponseDto>> getAllPosts() {
        List<PostListResponseDto> postListDto = postService.findAll()
                .stream()                               // 컬렉션(List)를 Stream 객체로 변환
                .map(PostListResponseDto::new)          // 각 Post 객체를 PostListResponseDto로 변환
                .toList();                              // 변환된 요소들을 새로운 리스트(List<PostListResponseDto>)로 수집
                                                        // List<Post> -> Stream -> PostListResponseDto -> List<PostListResponseDto>
        return ResponseEntity.ok().body(postListDto);
    }

    // 게시글 단건 조회 API
    @GetMapping("/posts/{id}")
    public ResponseEntity<PostResponseDto> getPostById(@PathVariable Long id){ // URL에서 값을 가져옴
        Post post = postService.findById(id);
        return ResponseEntity.ok().body(new PostResponseDto(post));
    }

    // 게시글 삭제 API
    @DeleteMapping("/posts/{id}")
    public ResponseEntity<Void> deletePostById(@PathVariable Long id, @RequestBody PostPasswordDto dto){
        postService.delete(id,dto.getPassword());
        return ResponseEntity.ok().build();
    }

    // 게시글 수정 API
    @PutMapping("/posts/{id}")
    public ResponseEntity<PostResponseDto> updatePostById(@PathVariable Long id, @RequestBody PostUpdateRequestDto dto){
        Post post = postService.update(id,dto);
        return ResponseEntity.ok().body(new PostResponseDto(post));
    }
}
클라이언트의 요청을 받는 Controller도 기능 구현을 완료하였습니다
각각의 요청과 응답에 맞는 DTO를 만들어 사용하도록 하였습니다
Postman 요청 보내기
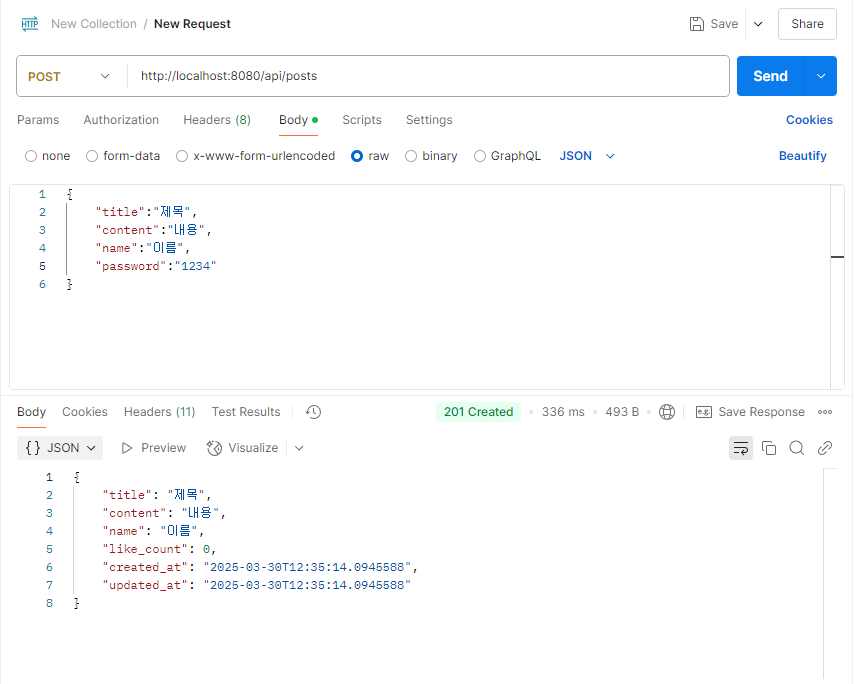
게시글 작성 API
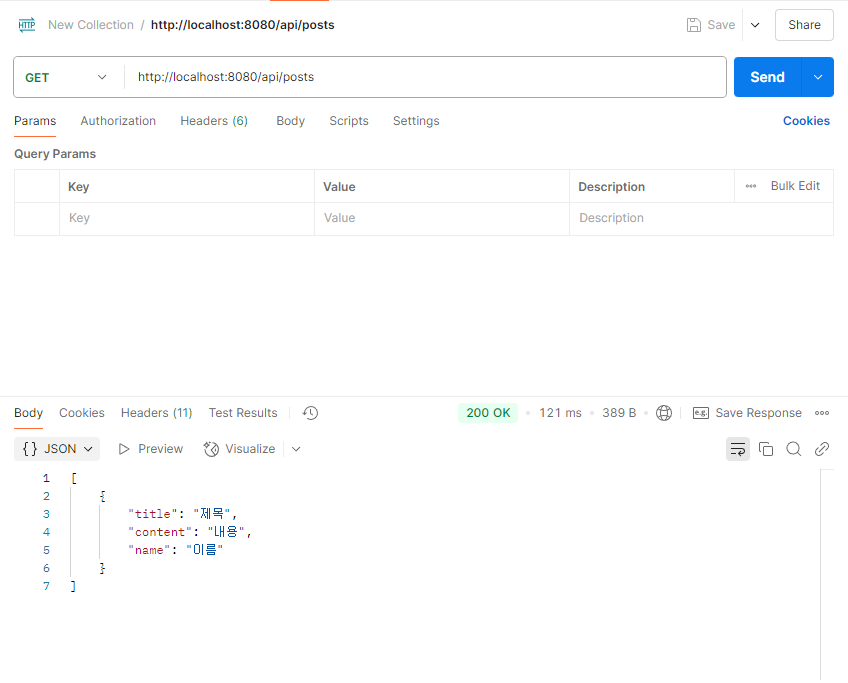
게시글 목록 조회 API
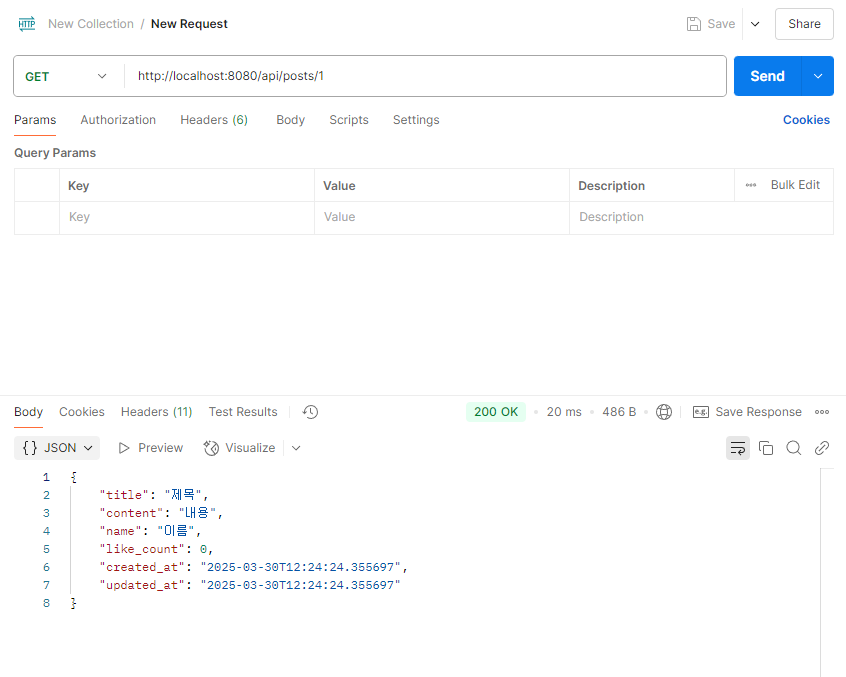
게시글 단건 조회 API
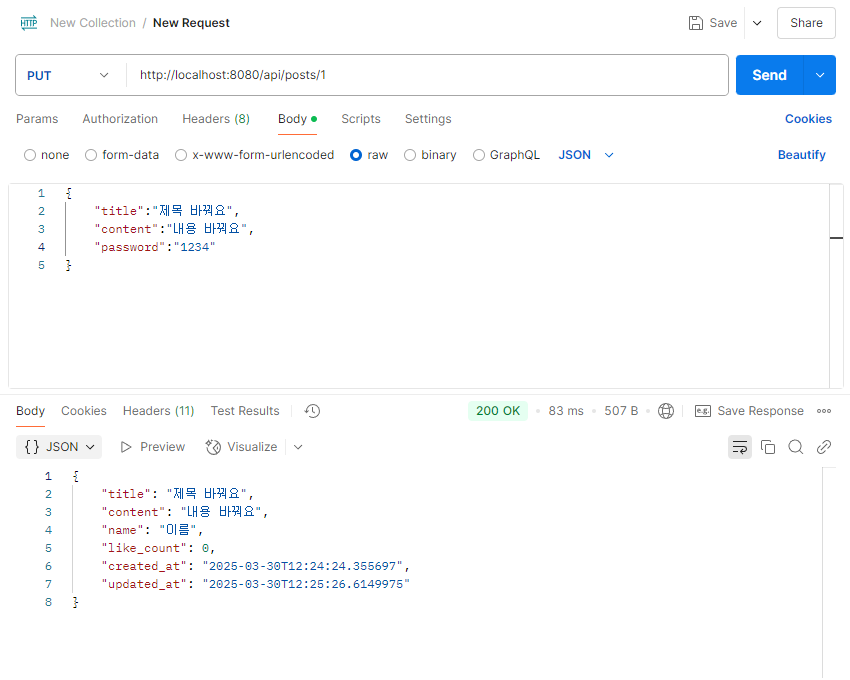
게시글 수정 API
게시글 삭제 API

기본적인 CRUD를 구현은 완료되었습니다
이제 추가적인 기능(좋아요,페이징,댓글)을 구현하거나 유효성 검사,예외처리,테스트 코드 작성을 하면 될 것 같습니다
반응형
'구름톤 유니브 스터디' 카테고리의 다른 글
| [구름톤 유니브] Spring 커뮤니티 게시판 JUnit 프레임워크를 활용하여 테스트 코드 작성하기 (0) | 2025.03.31 |
|---|---|
| [구름톤 유니브] Spring 커뮤니티 게시판 @RestControllerAdvice 기반 전역 예외 처리 구조 설계 구현 (0) | 2025.03.30 |
| [구름톤 유니브] Spring 커뮤니티 게시판 validation을 이용한 유효성 검사를 구현 (0) | 2025.03.30 |
| [구름톤 유니브] Spring 커뮤니티 게시판 CRUD 만들기 1 (엔티티 생성,게시글 작성 기능) (0) | 2025.03.29 |
| [구름톤 유니브] 스터디를 위한 Spring 커뮤니티 게시판 프로젝트 만들기 (0) | 2025.03.29 |